PHOTO SELECTION GUIDE
How to Choose the Best Photo for a Photo Bracelet
The best photo for a photo bracelet is usually clear, well lit and easy to recognize at a small size. But a meaningful image does not have to be technically perfect.
This guide shows what to check before cropping or submitting portraits, couple photos, pet pictures, screenshots and older photographs.
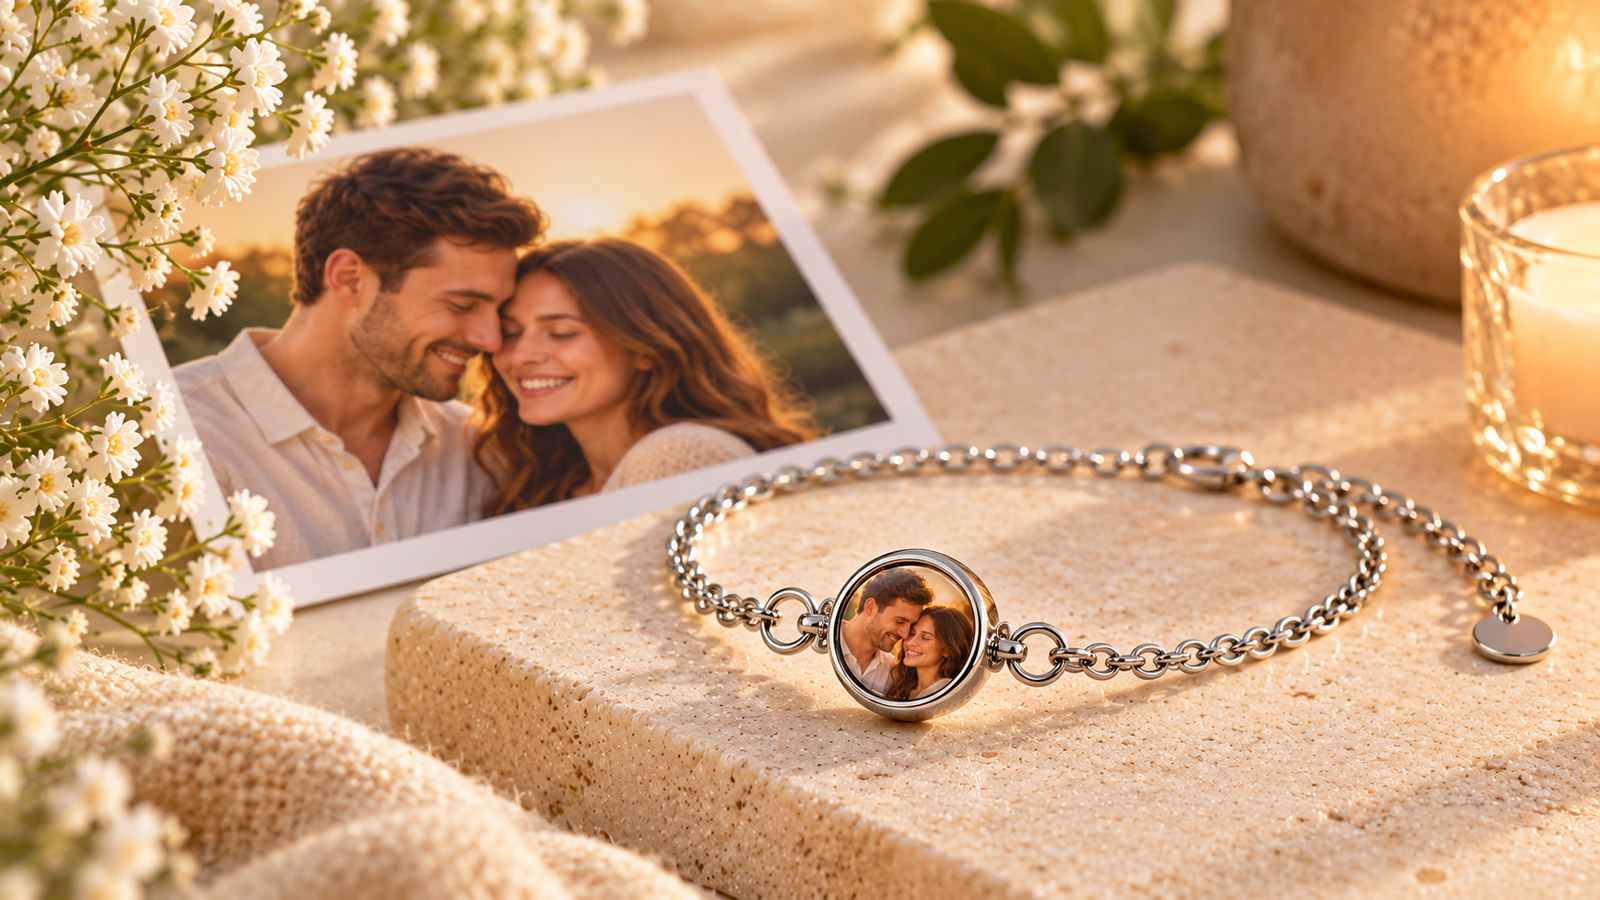
The best photo for a photo bracelet is usually a clear, well-lit image with a recognizable main subject, enough detail to remain readable at a small size, and some room around the subject for cropping. The most meaningful photo is not always technically perfect, so this guide also explains how to work with couple photos, pet and memorial images, screenshots, old prints and lower-quality originals.
1. Choose One Clear Main Subject
Start with a photograph where the person, pet or object you care about is easy to identify. For portraits, the eyes and main facial features should be visible. For pets, look for a photo where the eyes, face and distinctive markings are clear. A strong focal point gives you more flexibility when the image has to be reduced or cropped.
Quick check: shrink the photo on your phone. If the main subject is still easy to recognize, that is a useful sign. It is only a visual check, not a guarantee of the final bracelet result.
2. Look for Useful Lighting
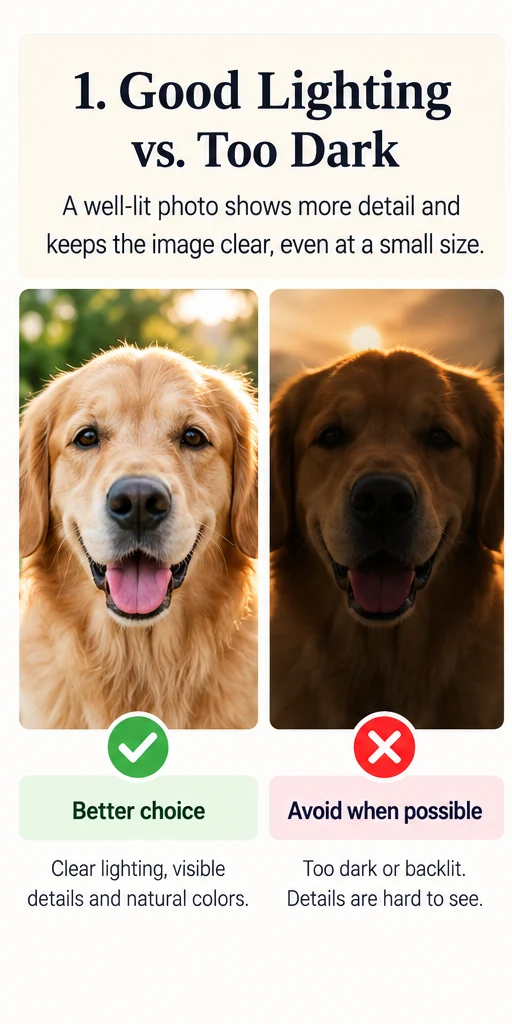
Choose an image where important facial or subject details are visible. Very dark shadows, blown highlights or strong backlighting can hide details that become even harder to see at a small scale. Soft, even light is usually easier to work with than a photograph where one side of the face disappears into shadow.
3. Make Sure the Subject Is Large Enough
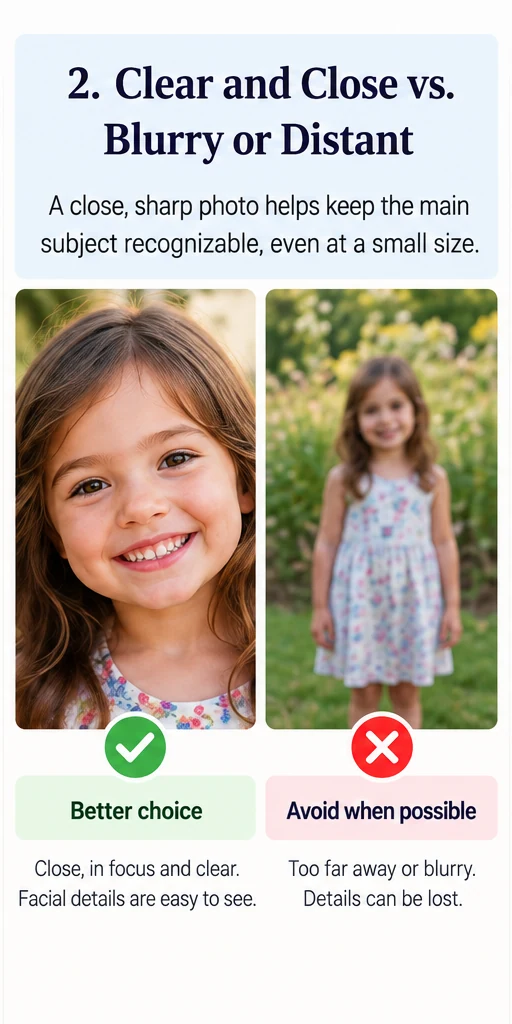
If the person or pet occupies only a tiny part of the original frame, heavy cropping may leave too little usable detail. A closer portrait is often easier to adapt than a distant group or landscape shot. Do not judge only by the overall sharpness of the photograph; look at how much usable detail remains in the subject itself.
4. Leave Enough Room for Cropping
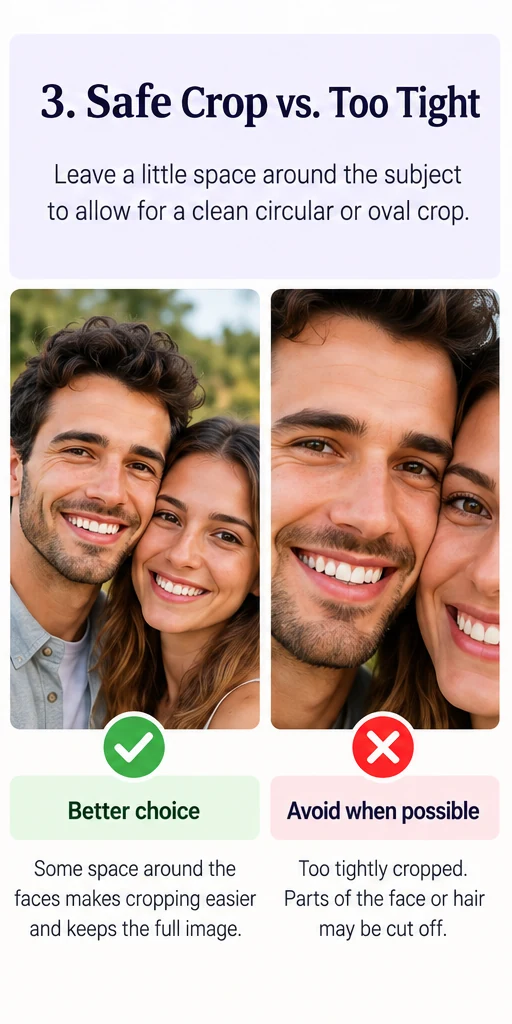
A bracelet image may need to fit a circle, oval, heart or another shape. Leave some space around the face, hair, ears or other important details so the image can be repositioned without cutting them off. A tightly cropped source gives the maker or preview tool much less flexibility.
5. Does the Background Matter?
A simple background can make the subject easier to read when the image becomes very small, but you do not need a studio portrait or a perfectly blank backdrop. What matters is separation: the face or subject should not disappear into a background with similar colors, heavy shadows or distracting detail.
6. Can You Use a Couple or Group Photo?
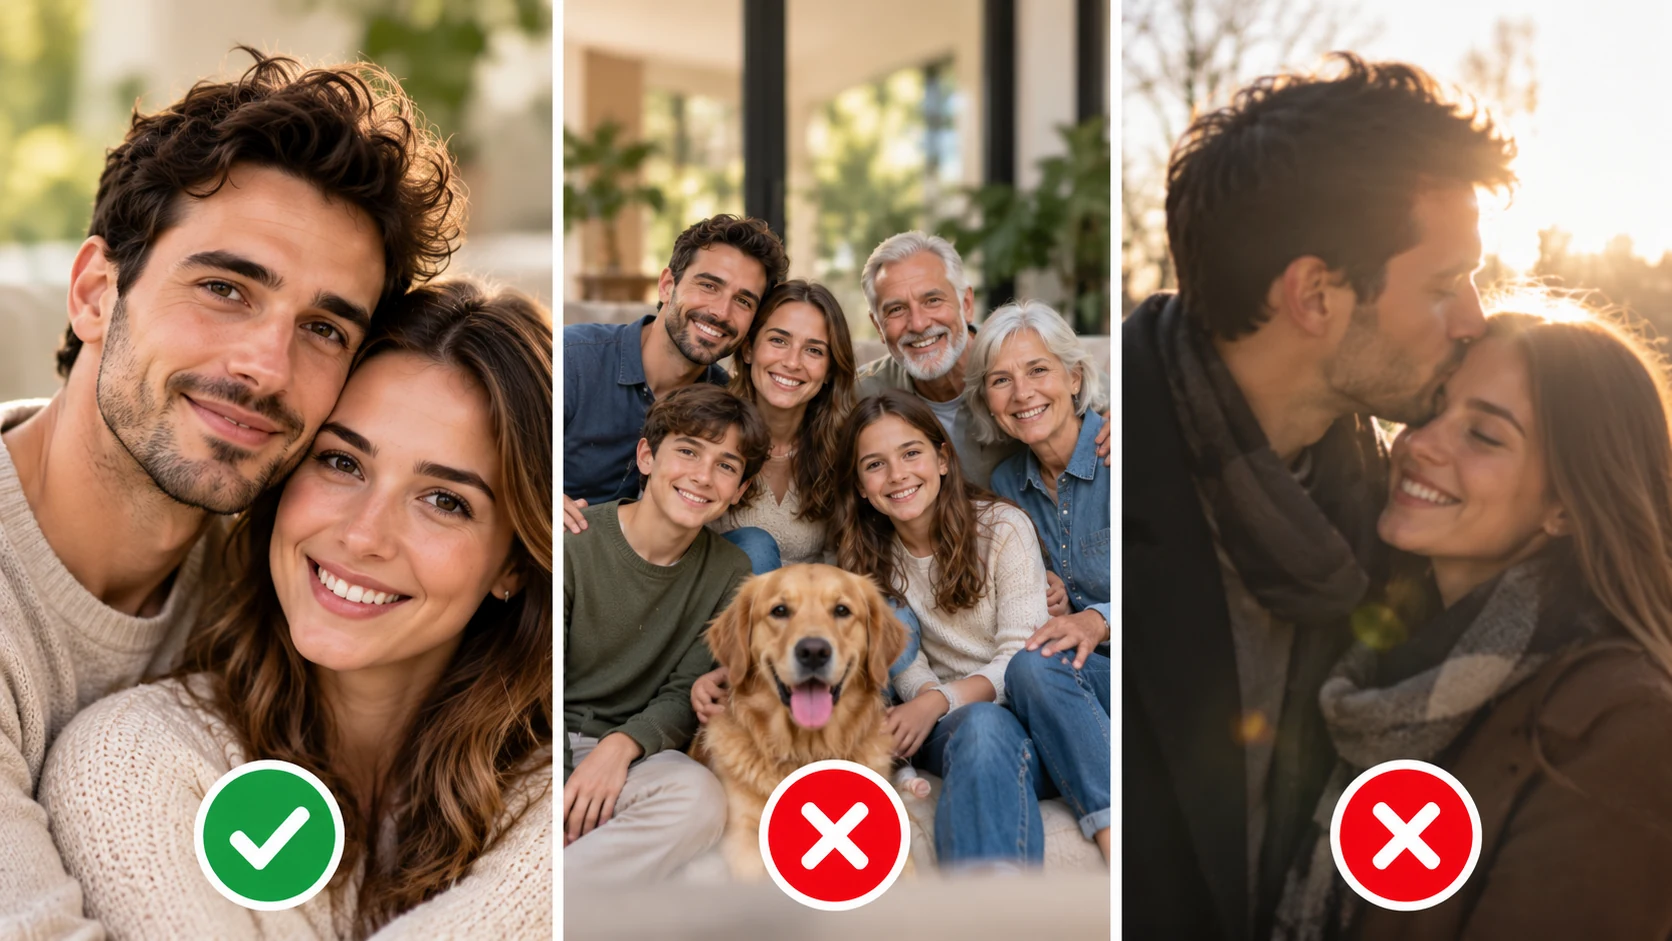
Yes, a photo of two people can be a meaningful choice when both faces are close enough, clearly lit and positioned so they can survive the final crop. Large group photos are more difficult because each face becomes smaller as the image is reduced. If one or two people are the real focus, consider whether a closer crop of them tells the story more clearly than keeping the entire group.
Before committing to a group image, preview it at a small size. If you have to zoom in to recognize the people, the original composition may be too distant for a small bracelet image.
7. Can a Photo Bracelet Have Two Pictures?
Some photo bracelet designs support more than one image, while others are built around a single photo. Do not force two separate photographs into one tiny image unless the design is intended for that layout. If the bracelet accepts two photos, choose images with similar visual weight so one does not become unreadably small. Always check the specific seller’s personalization options before preparing the files.
8. Can You Use a Pet Photo?
Pet photos work best when the eyes, face and distinctive features are easy to see. A close head-and-shoulders style image is often easier to crop than a full-body photograph taken from far away. Watch for dark fur blending into a dark background, bright highlights hiding light-colored fur, or ears and whiskers sitting too close to the edge of the frame.
9. Choosing a Photo for a Memorial or Remembrance Bracelet
For a memorial bracelet, emotional meaning matters as much as technical perfection. Start with the photograph that best represents the person or pet, then compare it with any similar originals you have. If two images feel equally meaningful, favor the one with clearer facial detail, better lighting and more room to crop.
If the only meaningful photograph is old, small or imperfect, do not discard it automatically. Use the best source available and prepare it carefully using the old-photo steps later in this guide.
10. Can You Use a Screenshot or Social Media Photo?
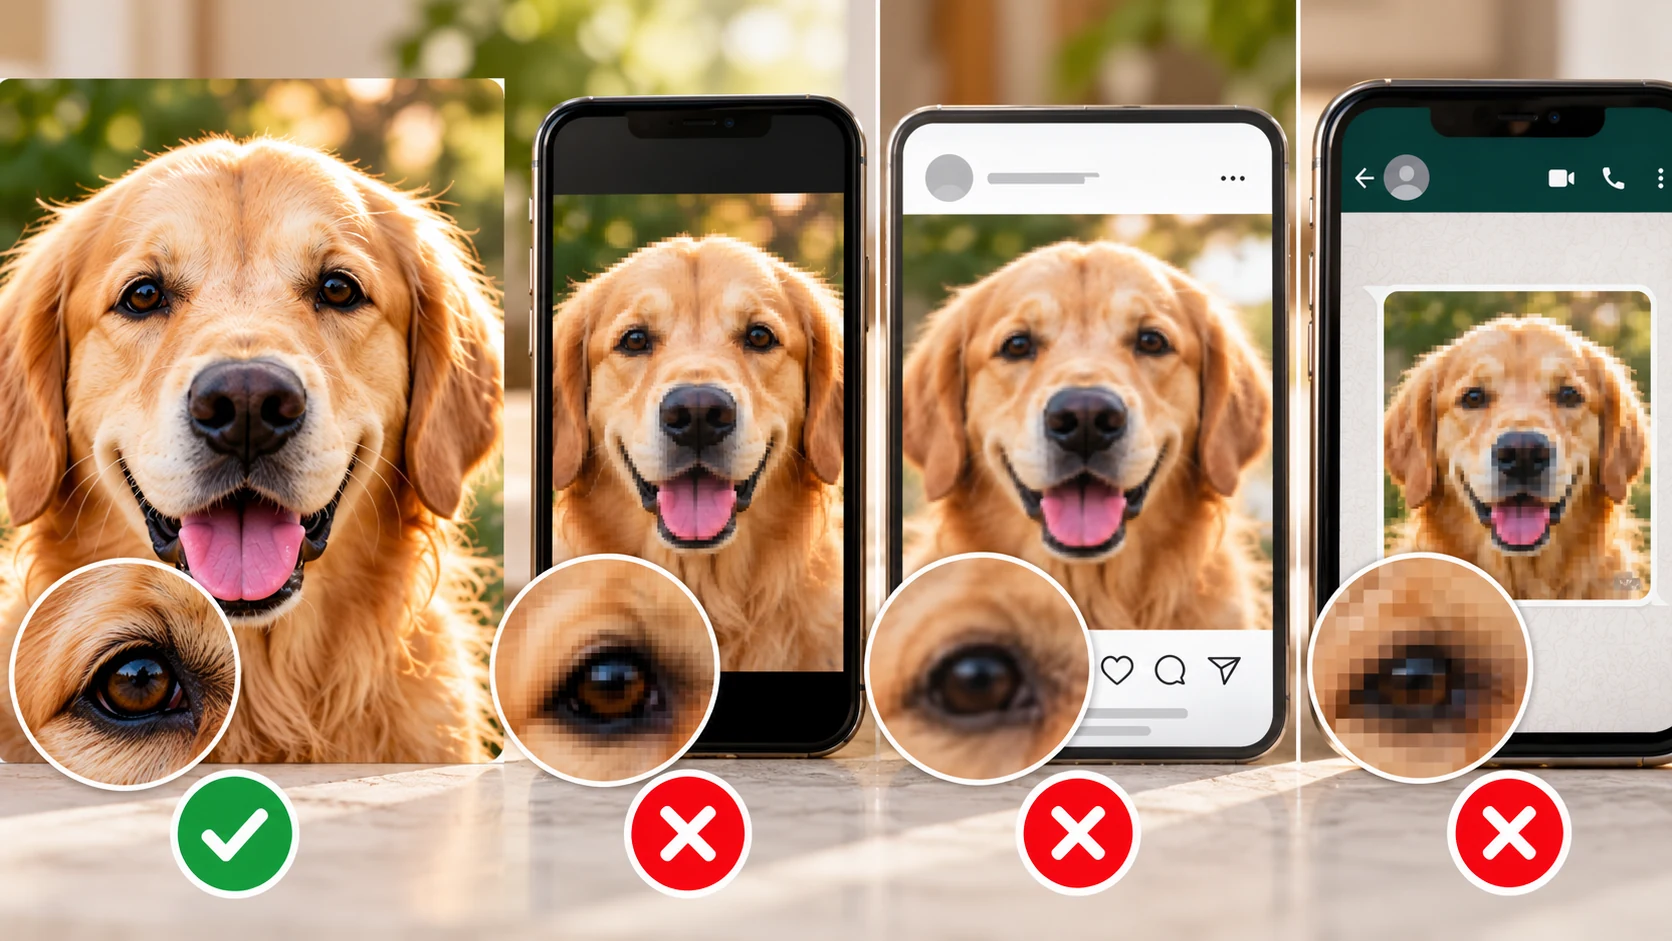
You may be able to use one, but it is usually better to find the original photo first. Screenshots and images saved from social platforms or messaging apps may have been resized or compressed, leaving less detail for cropping. If the original is available in your camera roll, cloud library or from the person who took the photograph, start there.
If a screenshot is all you have, crop away interface elements and compare it at the intended small size before uploading. Do not enlarge a tiny file and assume that the extra pixels create missing detail.
11. Use the Best Original File You Have
Whenever possible, work from the earliest and highest-quality version available rather than a copy that has been repeatedly saved, shared or compressed. Keep the original untouched while you make a separate edited copy. Photo upload requirements vary by seller, so check the required file type, dimensions and any preview instructions before submitting the image.
12. How to Prepare a Photo Before Uploading It
- Start with the best source. Use the original file or cleanest scan you can find.
- Check the subject at a small size. Make sure the face or important features remain recognizable.
- Try the likely crop. Test a circle, oval or similar crop without cutting off important details.
- Make only useful corrections. Adjust orientation, crop or brightness gently when needed.
- Check the seller’s preview. If a personalization preview is available, use it as the final composition check.
13. Should You Edit the Photo First?
Light editing can help when it solves a real problem. Straightening the image, making a sensible crop or gently correcting brightness can improve usability. If you edit on an iPhone, Apple’s official photo-editing guide explains how to adjust light and color and compare edits with the original. Keep an untouched copy of the original so you can return to it if the edit does not work.
Avoid aggressive filters, extreme sharpening or edits that change important facial features. AI enhancement may make an image look cleaner, but it can also invent or alter detail. For a meaningful keepsake, preserving the person’s or pet’s real appearance is more important than creating artificial sharpness.
14. How to Use an Old Printed or Low-Quality Photo
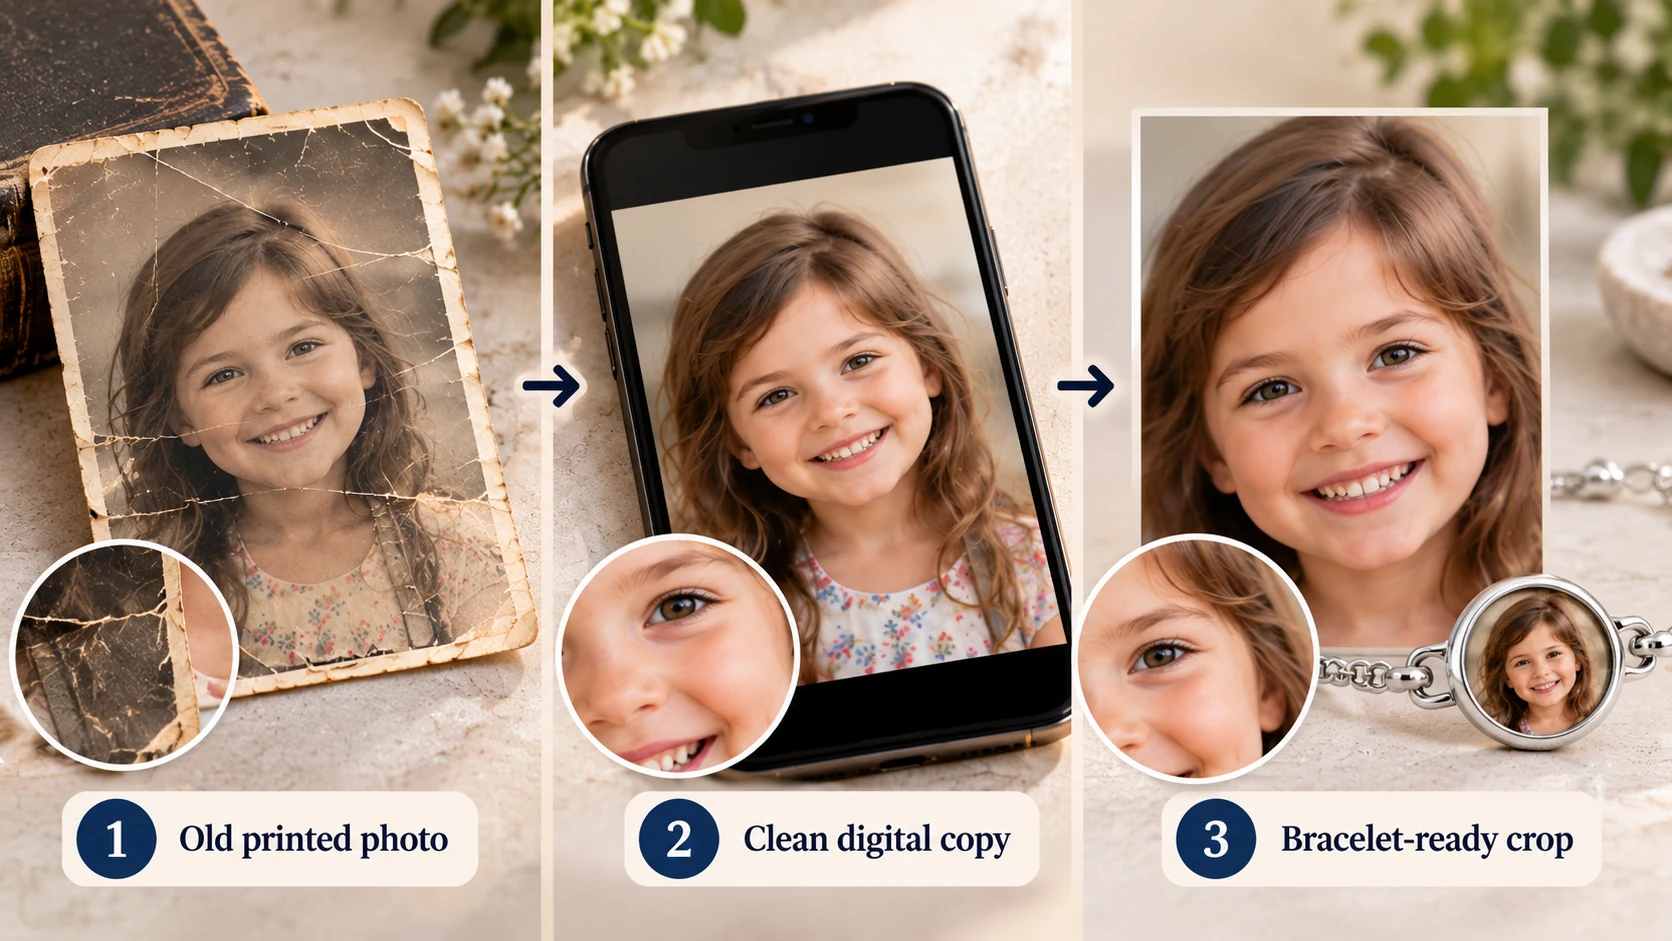
An older photograph can still be a strong choice. If you have the physical print, a clean scan is usually the best starting point. If you must photograph the print, place it flat in even light, keep the camera parallel to the photograph and avoid glare or reflections across the face.
Use the best original or scan you have before trying enhancement. Small corrections for dust, fading or brightness may help, but enhancement cannot reliably restore detail that was never captured. If the image is especially important, keep both the untouched scan and the edited copy.
15. Match the Photo to the Bracelet Type
The same photograph may behave differently depending on how the bracelet displays it. A visible photo charm presents the image directly, while a projection design uses a miniature image viewed through or projected from the jewelry. Engraved-photo styles may simplify tonal detail in a different way. Before finalizing the crop, understand the format you are buying.
For projection designs, see our guide to how photo projection bracelets work. If you are deciding between formats, our photo charm vs. photo projection bracelet comparison explains the practical differences.
Photos That Usually Need Extra Care
- Very blurry images or screenshots with visible compression
- Faces hidden in deep shadow, glare or strong backlighting
- Very distant subjects that require heavy cropping
- Crowded group photos with several small faces
- Images cropped tightly around the head, hair, ears or other important details
- Copies downloaded from social media when a better original exists
- Heavily filtered or artificially sharpened images
Test Your Photo Before Uploading
Give the image one final practical test. View it small, then try the crop you expect the bracelet to use. Ask whether the main subject is immediately recognizable, whether the eyes and important features remain visible, and whether the composition still makes sense without the outer parts of the original photograph. This simple test can reveal problems that are easy to miss when viewing the image full-screen.
Final Photo Checklist
- The main subject is immediately recognizable at a small size.
- Faces, eyes or important details are not hidden by shadow or glare.
- The subject is close enough to retain useful detail after cropping.
- There is room around important features for the final crop.
- The background does not overwhelm the subject.
- You are using the best-quality original or scan available.
- Any editing still looks natural and faithful to the original.
- The file and number of photos match the seller’s personalization requirements.
- You have checked the seller’s preview when one is available.
Frequently Asked Questions
Does the photo need to be professional?
No. A clear personal photograph can work well. Subject visibility, usable detail and composition matter more than whether a professional photographer took it.
Should I crop the picture before uploading it?
You can prepare a sensible crop, but keep the original file. If the seller provides a preview or cropping tool, check the final framing there before submitting the personalization.
Can I use a black-and-white photo?
Possibly. Whether color or black-and-white is suitable depends on the personalization process and the look you want. Check the specific seller’s requirements rather than converting the image automatically.
Can I use a photo from Facebook or Instagram?
It may work, but use the original file instead if you can find it. Social-media copies may be resized or compressed, which can reduce the detail available for a small crop.
Can two people fit in a photo bracelet?
Often, if both faces are close, clear and positioned well for the bracelet’s crop. The exact result depends on the design and personalization process, so use the seller’s preview when available.
Should I remove the background?
Not automatically. A background can stay if the subject is easy to distinguish from it. Remove or simplify it only when the specific personalization process calls for that or the background genuinely interferes with the subject.
What if my only meaningful photo is blurry?
Look first for another copy of the same photograph or the original file. If none exists, use the best version you have and ask the seller whether it is suitable. Enhancement can improve appearance in some cases, but it cannot reliably recreate missing facial detail.
Still deciding which format suits your photo? Explore our complete Photo Bracelets guide.